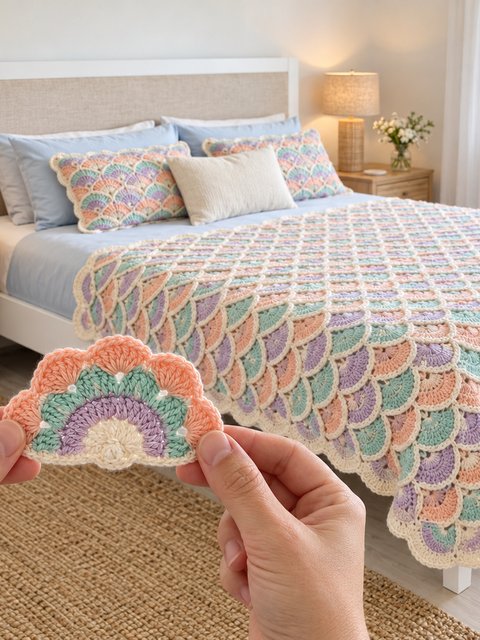
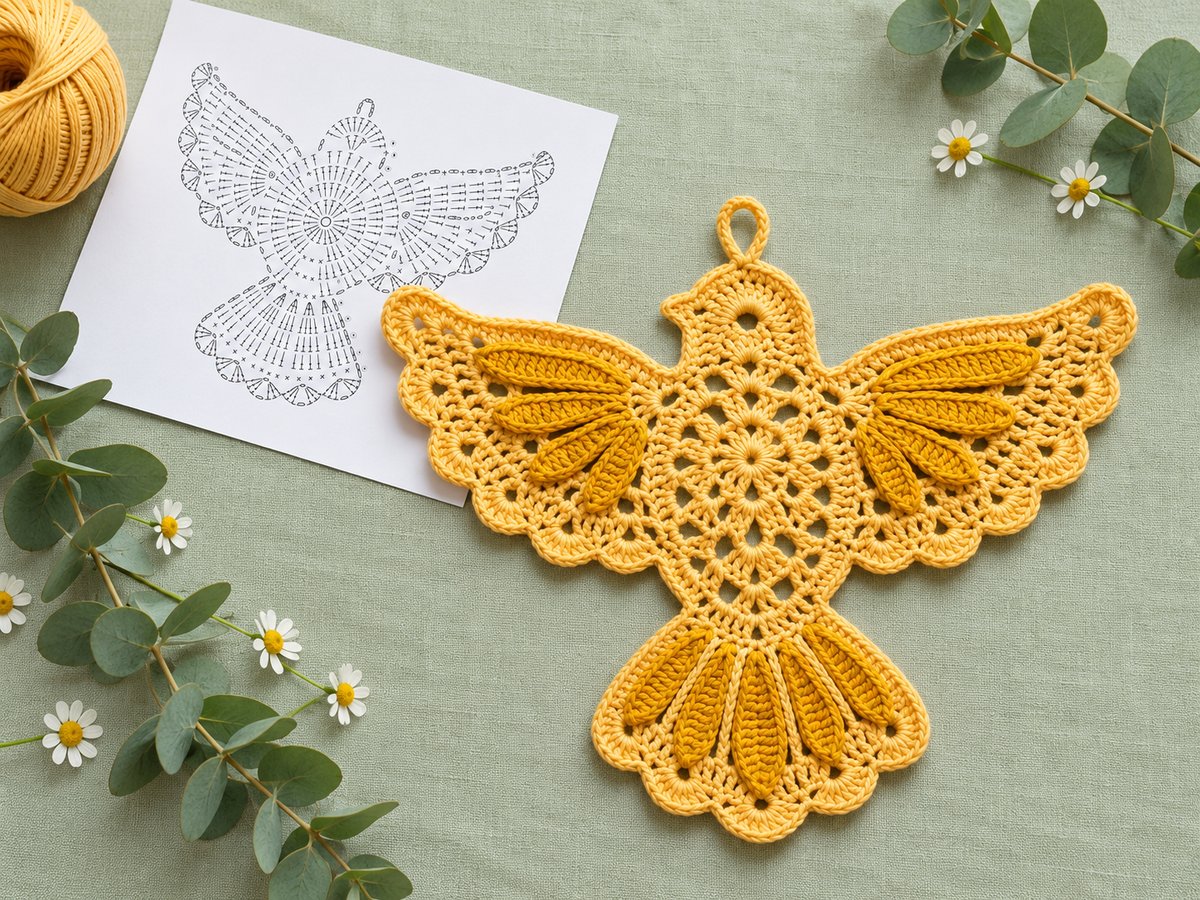
This yellow dove is like a little ray of sunshine. A lacy rosette makes the body, two wings and a fanned tail grow out of it, and raised golden leaves give every feather a rich, textured look. Hang it in a window, on a Christmas tree, on a wall or on a gift.
The dove is worked in one piece from a magic ring, with the golden leaves made separately and sewn on at the end. You only need chain, slip stitch, single crochet, half double crochet and double crochet. A stitch chart helps if you like to follow diagrams, but every round is also written out below.
What you need
- Yarn: DK weight (light 3) cotton in 2 colors: butter yellow (dove) and golden mustard (leaves). About 110 m (120 yd) yellow and 40 m (44 yd) golden.
- Hook: 3.5 mm (E-4). Go down to 3 mm for a stiffer, tighter dove.
- Tools: tapestry needle, scissors, stitch markers, blocking mat, pins and fabric stiffener or spray starch.
- Optional: a small black bead for the eye and a ribbon for hanging.
Abbreviations and size
- ch chain
- sl st slip stitch
- sc single crochet
- sc2tog 2 sc worked together
- hdc half double crochet
- dc double crochet
- sp space
- st(s) stitch(es)
Size: about 28 cm (11 in) wide and 24 cm (9.5 in) tall after blocking, without the hanging loop.
Parts: 1 body with 2 wings, a tail and a head, plus 13 golden leaves (4 for each wing and 5 for the tail).
Body: the center rosette
Work every round with the right side facing you. The chain-3 at the start of a round counts as 1 dc unless the round says otherwise. Join each round with a sl st to the top of the first chain-3.
- Round 1 (yellow): Make a magic ring. Ch 3, 11 dc in the ring. Join. [12 dc]
- Round 2: Ch 4 (counts as dc + ch 1). *Dc in the next dc, ch 1. Repeat from * 10 more times. Join to the 3rd ch of the ch 4. [12 dc, 12 ch-1 sps]
- Round 3: Sl st into the first ch-1 sp. Ch 3, 2 dc in the same sp, ch 1. *3 dc in the next ch-1 sp, ch 1. Repeat from * 10 more times. Join. [12 shells of 3 dc]
- Round 4: Sl st in each of the next 2 dc and into the ch-1 sp. Ch 3, (1 dc, ch 2, 2 dc) in the same sp. *(2 dc, ch 2, 2 dc) in the next ch-1 sp. Repeat from * 10 more times. Join. [12 clusters, 48 dc]
- Round 5: Ch 1. *Sc in each of the next 2 dc, 2 sc in the ch-2 sp, sc in each of the next 2 dc. Repeat from * around. Join. Do not fasten off. [72 sc]
Mark the zones: count 72 sc around the rosette and place markers so you can find the parts easily: head = sts 1–6, wing A = sts 7–27, gap = sts 28–31, tail = sts 32–47, gap = sts 48–51, wing B = sts 52–72. The two gaps are left as plain edge.
Wings, tail and head
Cut the yarn after Round 5. For each part, join yellow in the first stitch of its zone, work the rows below and turn at the end of every row. Make both wings the same.
Wings (make 2: sts 7–27 and 52–72, 21 sts each)
- Row 1: Ch 3, dc in each of the next 20 sts. Turn. [21 dc]
- Row 2: Ch 4 (counts as dc + ch 1), skip 1 st, dc in the next st. *Ch 1, skip 1 st, dc in the next st. Repeat from * to the end. Turn. [11 dc, 10 ch-1 sps]
- Row 3: Ch 3. *Dc in the next ch-1 sp, dc in the next dc. Repeat from * to the end. Turn. [21 dc]
- Row 4 (scallops): Ch 1, sl st in the first st. *Skip 1 st, 5 dc in the next st, skip 1 st, sl st in the next st. Repeat from * 4 more times. Fasten off. [5 shells]
Tail (sts 32–47, 16 sts)
- Row 1: Ch 3, dc in each of the next 15 sts. Turn. [16 dc]
- Row 2: Ch 3, 1 dc in the same st, then 2 dc in each remaining st across. Turn. [32 dc]
- Row 3 (scallops): Ch 1, sl st in the first st. *Skip 1 st, 5 dc in the next st, skip 1 st, sl st in the next st. Repeat from * 6 more times (7 shells). Then skip 1 st, 5 dc in the next st and sl st in the last st. Fasten off. [8 shells]
Head (sts 1–6)
- Row 1: Ch 3, dc in each of the next 5 sts. Turn. [6 dc]
- Row 2: Ch 1, 2 sc in each st across. Turn. [12 sc]
- Row 3 (hanging loop): Ch 1, sc in each of the first 6 sts. Ch 14 and sl st in the base of the chain to make the loop. Sc in each of the remaining 6 sts. Fasten off. [12 sc and 1 loop]
Optional beak: at the front corner of the head, work sc, ch 3, sl st in the 2nd ch from the hook, sl st in the next ch and sc in the next st.
Golden feather leaves
Make 13 leaves in golden yarn: 4 for each wing and 5 for the tail. Each leaf is worked around a foundation chain, and you work the two sides in different loops to get the raised, ridged feather look.
- Foundation: Ch 13.
- Side 1 (back loops of the chain): Sc in the 2nd ch from the hook and in the next ch, hdc in each of the next 2 ch, dc in each of the next 3 ch, hdc in each of the next 2 ch, sc in each of the next 2 ch. [11 sts]
- Base: Work 3 sc in the last ch.
- Side 2 (front loops of the chain): Sc in each of the next 2 ch, hdc in each of the next 2 ch, dc in each of the next 3 ch, hdc in each of the next 2 ch, sc in each of the next 2 ch. [11 sts]
- Finish: Sl st in the first sc and fasten off, leaving a 20 cm (8 in) tail for sewing. [25 sts]
Rule to remember: each leaf has 11 sts on each side and 3 sc at the base. Pull the tail snug so the leaf is plump, like a real feather.
Edging and assembly
- Edging (yellow): Join yellow in one of the gap sts. Ch 1 and sc evenly around the whole outline of the dove: 1 sc in each st and each row end, 3 sc in each wing tip and tail corner, and sc2tog where two parts meet. Join, fasten off and weave in the ends.
- Wings: Sew 4 leaves to the front of each wing, fanning them out from the shoulder with the tips pointing toward the wing tip.
- Tail: Sew 5 leaves to the tail, fanning them out from the center of the body toward the scallops.
Use the long tail of each leaf to sew it in place with small stitches. The picture shows the leaf positions.
Finishing and shaping
- Pin the dove flat on a blocking mat, with the wings spread and the tail fanned out. Steam lightly and let it dry.
- For a firmer dove that holds its shape on a tree, brush on fabric stiffener or spray with starch and let it dry flat.
- Sew on a small black bead for the eye, if you like.
- Thread a ribbon or thin cord through the loop on the head and hang.
Tips for success
- Count after Round 5. You need exactly 72 sc before you mark the zones.
- Use markers. Mark the first stitch of each zone so the head, wings and tail land in the right places.
- Keep tension even. Loose stitches make the wings floppy. Go down a hook size if needed.
- Make all 13 leaves first. Then you can lay them out before you sew.
- Choose a smooth cotton. It shows the lace and the raised leaves much better than a fuzzy yarn.
- Weave ends as you go. The dove is small, so loose ends show.
Common mistakes to avoid
- Wrong stitch count in Round 5. Check for 72 sc before you start the wings.
- Uneven wings. Make sure both wings use exactly 21 sts.
- Skipping the blocking step. Unblocked lace curls and the wings droop.
- Sewing the leaves on too tightly, which makes the wings pucker.
- Choosing two yellows that are too close. Pick a clearly darker golden for the leaves.
Ways to change this pattern
- Classic white dove: white lace with silver-grey leaves.
- Spring version: pale pink lace with soft green leaves.
- Garland: make 5 doves and hang them from one cord.
- Mini dove: use fingering yarn and a 2.25 mm hook.
Frequently asked questions
What skill level do I need?
Intermediate. If you can make a magic ring, a double crochet and a half double crochet, you can do it. The leaves take a try or two, so make one practice leaf first.
How long does it take?
The dove takes about 3 hours and the 13 leaves about 3 hours more, so plan on a weekend.
What is the best yarn?
Smooth mercerized cotton in DK weight. It gives clean stitches and shows the lace and the raised leaves well.
How do I make it stiff?
Block it flat, then brush on fabric stiffener or spray starch and let it dry flat. This keeps the wings spread when you hang it.
Can I use a different color?
Yes. Any two colors work. Choose a lighter color for the lace and a darker shade for the leaves.
Can I sell things I make from this pattern?
Yes, you can sell finished items. Please credit this website as the designer and do not copy or share the written pattern.